Use of Unshake 1.5
-
Launching with M/S Windows
-
Launching with Generic Unix (including
Linux)
-
Launching with Mac OS X
-
Basic Use of Unshake
-
Explanation of the Controls
-
Preparing Images for Deconvolution
-
About the Sample Images
Please see the instructions
for installation if things don't work out.
-
If you want to avoid browsing for them later, put the images (PNG, GIF
or JPEG files) you want to Unshake in the folder called "source" in
the Unshake folder.
-
Double-click on the file in the Unshake folder called "Launch". This
assumes
that Sun's Java 2 is already installed in one of several standard
locations.
If it isn't, please read the Instructions for
Installation.
-
If you want to avoid browsing for them later, put the images (PNG, GIF
or JPEG files) you want to Unshake in the directory called "source" in
the Unshake directory.
-
In a terminal window, change directory to the Unshake directory, and
run the shell script unlaunch.sh;
[myname@localhost Unshake]$ ./unlaunch.sh
This assumes
that Sun's Java 2 is already installed and the file "java" is in your
PATH.
If it isn't, please read the Instructions for
Installation, and put the Java 2 executable into your PATH environment
variable.
Alternatively, if java is in your path, you can launch
Unshake from the
command line with
java -Xmx512m -jar Unshake.jar filename.jpg...
Hint
The incantation
-Xmx512m
instructs the Java Virtual Machine (JVM)
to allocate a maximum of 512 Megabytes to the process. Small images do
not need this.
-
If you want to avoid browsing for them later, put the images (PNG, GIF
or JPEG files) you want to Unshake in the folder called "source" in
the Unshake folder.
-
Assuming that the launcher is correctly installed, and Mac OS X has
not changed significantly since this version of Unshake was written,
open the Unshake applescript icon which you set up on installation.
If that isn't working, then you could do it the long way
round, and
open a terminal (Applications>Utilities>Terminal), then
type
cd /Applications/Utilities/Unshake
chmod 755 ./unlaunch.sh
./unlaunch
as you would under any Unix
system (the "chmod"
line only needs to be typed the first time you use Unshake).
-
At the bottom of the control panel is a list of files in the "source"
directory
(folder). If your image is there, click on it, and
it will appear in a window. If the file is not listed, either click
on "Open", to browse through your files, or Drag-Un-Drop (ahem) the
file from
a directory listing onto the source window.
-
Choose how severely the image is blurred - "normal" or "severe". For
guidance in settings, you could look at the examples which will be
published, e.g. at the
current
home or at www.unshake.co.uk,
but briefly,
"severe" is moderate shake or very bad blur, anything milder is
"normal", anything worse means you should shrink the image with an
image processor before applying Unshake to it.
-
In general it is safest to leave the "quality" set to "Estimate",
but see below, under controls.
-
You can tell the program what you
think is the most important part of the image to concentrate
on. Change the shape and size of the window which holds the image, and
use the scroll bars, until the window only contains parts of the
picture which are blurred in the same way as the part of the image in
which you are interested. For example, if the picture is a portrait of
someone, but you want to focus on the background, make sure that
everything in the window is background.
The window should not be too small, however - 200 by 200
pixels is a
reasonable minimum, and if you can make it larger without including
parts of the picture which are blurred differently, then that would be
much better.
- You can say how long you
want to wait for the answer. Click on "Estimate", and after a few
seconds' calculation, you will see an estimate of how long a basic
deconvolution of the picture will take, assuming
that you
have enough RAM and no other programs are running. To the right of
that number, you can choose how much longer you are prepared to wait -
from "x1"="the estimate", through "x2"="twice as long", to "x100"="I
will wait until it is finished, or 100 times as long as the estimate,
whichever is sooner". I use "x1" for a first preview, and "x100" after
that for the "best" result - it has never yet really taken 100 times
as long - the option is there as a guarantee that the program will
give its best result.
The numbers are only approximate.
- Click on DeBlur.
-
Wait. The windows will seem dead for a while.
Eventually you will get Unshake's estimate of how the picture should
have looked, if it hadn't been blurred. The result will be saved if
possible in
the directory ("folder") called "results", as a JPEG file with the
same name as the original.
-
To save the result anywhere else on your computer, click on "Save".
(D'oh!)
-
If you wish to change the amplification (which gives more clarity, but
risks distorting the image), click on ReDraw afterwards to redisplay
the image.
-
If the image contains clearly repeated structures, like a stand of
upright trees, or railings, then they may have been mistaken for
shake, and removed or distorted. To prevent this, change the view in
the window, and click on DeBlur again. Alternatively, if "haloes"
appear around features, you may need to select "severe blur", or to
enlarge the window, or you may be asking for the wrong quality - as a
last resort, try requesting "basic" quality or "portrait" instead of
"Estimate Quality".
Another sign that something may be wrong is if, scrolling
down the
centre panel of the controls, you see "Quality Basic 1.5", when you
have
selected "Estimate Quality". This
usually indicates either that you need to select a more severe blur, or
that
the window or image is too small.
- To close Unshake, close one of the windows.
-
Size of Blur (Normal or Severe): How large would a star look if it was
blurred as much as this image? "Normal" means that, with the brightest
part of the blurred image of a star near the centre, the blurred image
will fit into a circle with radius 4 pixels. "Severe" means 8
pixels.
Anything worse and it is time to shrink the source image
in an
image processor (this may be made available in later versions of
Unshake), and then expand the results afterwards. If the image is that
blurred, probably no-one will notice that you have done it.
- The chooser for quality;
-
Portrait: This tells Unshake that the image does not have much fine
detail, and not to expect it when it analyses the blur. It does not
tell it to show less detail - that's what
'Amplification'
controls. To put it another way, "portrait" does not bring out spots
too much.
- Estimate: Instructs Unshake to guess the correct
setting. This is
usually best. The program analyses the image on scales larger than
your choice of how blurred it is, and calculates how much detail
should be present on the smaller scales, which are blurred.
- Scenic: Forces Unshake to treat the image as having a
lot of
hidden detail. May produce unpleasant results.
- Basic: Expect even less detail than "Portrait". If
there are any edges to
be found in the image, you won't need a weaker setting than this.
- Select Blurred: If ticked, this instructs the program to
deduce the
blur only from the scene visible in the source window. If the tick is
removed, the entire image will be used to deduce the blur, with most
attention given to the central region.
- Batch: Instructs Unshake to process every image on the list
in
sequence, with the current settings. Just tick this, click on DeBlur,
and go off for a rest. If both "Batch" and "Select Blurred" are
ticked, the program will use a semi-intelligent algorithm to decide
from which region to derive the blur, in each image.
- Flat Window: Recovers the behaviour of previous versions of
Unshake, in which
low spatial frequencies are left unaffected by filtering. Can cause
haloes
around high-contrast features.
- Amplification: Unshake works by finding small clues in the
images
which humans usually miss, but every picture contains some 'noise',
especially when it's found its way into a computer. Amplification
determines how much noise to risk showing. If Unshake tries too hard
to use all the clues (high amplification), the images get covered with
false detail, which looks like ripples. If amplification is turned
down too far, the picture gets blurred.
- Open: Open a file browser, to select an image file from
those on
your computer.
- DeBlur: Unshake recovers lost detail, so far as it can.
- ReDraw: This does not recalculate the blur (kernel, PSF).
It just
redraws the currently selected image
according to your changed choice of "Amplification".
- Save: Save the result.
- Remove: Remove entry from the list of files.
It is best to start with your own pictures, and to scan them into
your computer if you can. First, note that Unshake works with pictures
with widths and heights of 64, 128, 256, 512... pixels. If you give it
a picture with a width of 257 pixels, it will pad it out (with an
averaged
colour) to 512 pixels, and will take much longer to process it than
it would a picture with a width of 256 pixels. (This is a property of
the
Fast Fourier Transform algorithm which it uses.) 2048 by 2048 is the
largest image which can be processed at the moment.
Crop all borders and edges from the image, and try to avoid
features
added after the picture was taken, such as writing.
The reason for this is that such
features are usually sharp, and so become distorted when the rest of
the image
is sharpened.
Try not to adjust the brightness and contrast of the picture,
or if
you must, ensure that the "gamma" is set to be linear - this may be
indicated by a straight line on a graph. Failure to do this puts
ripples or ghosts around edges with high contrast.
A disclaimer: Unshake has difficulty with images which are
overexposed, underexposed, twisted (meaning that the image turned
round an axis between the camera and the subject), or covered in
fluff. So don't try to process images of playful black kittens in
coal-sheds at night, after the kitten has walked across your scanner.
When you save the picture, use Portable Network Graphics (PNG)
format,
if your installation can use it. Failing that, either use GIF or JPEG
format. GIF is probably the best of the two, because while it is much
noisier, there is a catch with JPEG - encoders smooth out the picture a
little, not enough for a human to
notice, but this destroys the information which Unshake uses to
reconstruct the image. It's best to include as much information as you
can in the file, by specifying "100 percent quality" (you may find
this under 'options' in your scanner's menu). It is generally
recommended that you don't use 100 percent for normal purposes.
If you use images from the web, you have no choice over how
they were
compressed, but you should be aware that Unshake may have difficulty
with JPEGs, if they have been highly compressed. (There is no real
problem that Unshake saves files in JPEG format,
because by
that stage all of the useful information is included in the
JPEG. This version of the program also creates much more detailed JPEG
files than people normally use.)
Once you have saved the image, you will probably want to copy
it into
the "source" directory (called a "folder" under Windows). Then start
Unshake, as above.
- fest.png:
A piece
of background cropped out of a close-up portrait at a local
festival.
- festsevere.png:
The
same as fest.png,
except that this one is twice as large and so "severely" blurred.
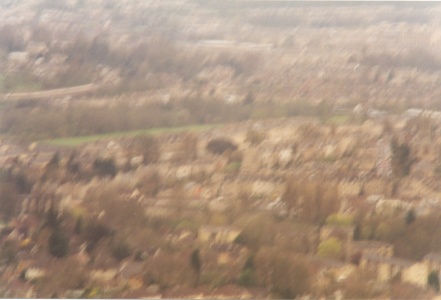
- larkhall300du.png:
This
picture was an example for Unshake 1.3, but I have re-scanned it to a
higher accuracy. (No other trickery, honest!) See the examples
for further explanation. This image just makes it into
"normally" blurred, even though it is shaken. Incidentally, the image
"stsav.gif" in earlier distributions was from a photograph taken
immediately after this one, of the same view from Solsbury Hill.
- A_meerkat.jpg:I
used this in Unshake
1.4, and I rather like it. If one
scans in a photo at high enough resolution, on a good enough scanner,
it will appear blurred. Unshake will then usually improve the
resolution. Other image processors will improve this image as well,
but I did need a meerkat.
- Sols.jpg:
Ah, the original icon
for Unshake. Unfortunately, Unshake has improved a lot since then, and
the original photo has yellowed so much that it's not worth scanning
in again. "Portrait" mode is best for this one, particularly because
it is too small for the program to get a good estimate of its
"quality".
- tree-severe.jpg:
I
deliberately shook the camera as an experiment. Some poplars which used
to grow
outside our labs. This is "severely blurred". As you might have noticed.
© M.D. Cahill 2000-2006.